


Introduction
So my previous post looked at B2B Direct and Teams shared channels due to a customer request to link two separate tenants together as part of an acquisition.
How to setup B2B Direct in Azure and use Teams Shared Instances (switchitup.tech)
One of the other requirements was for tenants in both organizations to be searchable via the GAL (Global Address List).
Azure B2B Direct does not support this as part of its package offering so we decided a cross-tenant sync would be best. Push all/required users into each tenant which will then create all external users as "contacts" within Exchange Online.
Now by default users can only see one GAL and by default, the GAL will show all internal and external users from B2B collaboration, External Guests & cross-tenant sync.
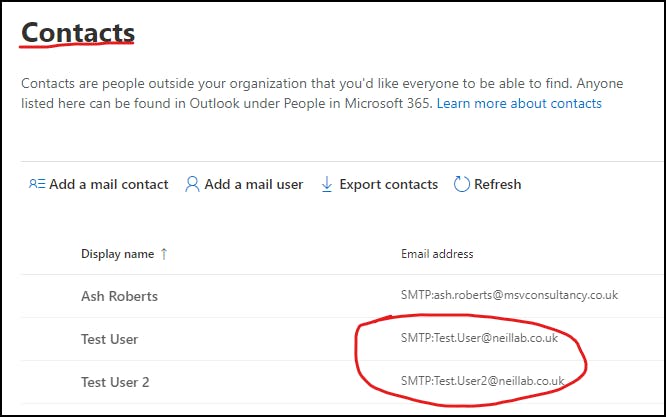
To make it easier for users to locate who they require we have added two separate address lists that populate based on "Switchitup" users and "NeilLab" users. Switchitup in my case will show all my internal users. NeilLab will show all the external users from his tenant.
To create the Address Lists, you will need to review exchange RBAC roles and then build out the lists using Powershell.
First, let's get our external users syncing with Cross-tenant Sync, and then we will look at building out the Address Lists.
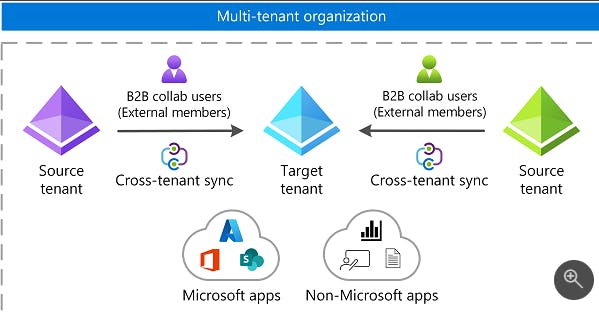
Cross Tenant Sync
Allows you to sync the external users into your tenant so they appear in your Azure Active Directory. This then allows you to allow access to shared apps and even make use of conditional access policies for data/app access. These external users are also added as "Contacts" in Exchange Online so they appear in your company's GAL (Global Address List).
B2B direct connect and cross-tenant synchronization are designed to co-exist, and you can enable them both for broad coverage of cross-tenant scenarios.
Example:
For more information please view Microsoft Documents:
What is a multi-tenant organization in Azure Active Directory? - Microsoft Entra | Microsoft Learn
External Entities Pre-Check
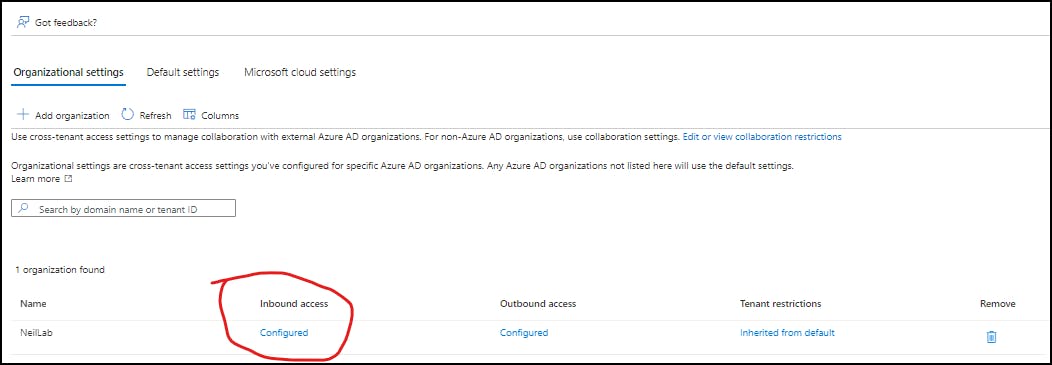
First, we need to check that we have allowed External admins to sync users into our tenant and we do this via the External Identities in Azure AD.
"Azure Active Directory > External Identities > Cross-tenant Access"
Select Inbound access for your configured tenant. If you have not configured a tenant for B2B yet review my first post here: <LINK>
finally, on the "Cross-tenant Sync" tab make sure "allow users sync into this tenant". This is important as the admin on the external tenant has to run a sync to push the users into your tenant. This setting also has to be enabled on the External Tenant so you can run cross-tenant sync and sync to the external tenant.

Cross-tenant Sync setup
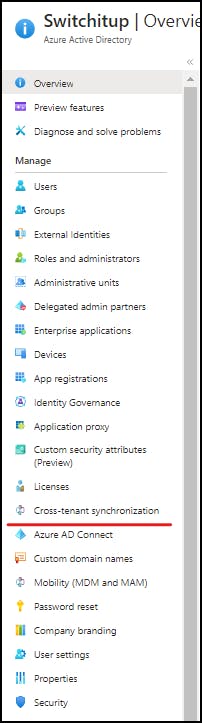
Navigate back to Azure Active Directory Home and on the left-hand navigation you will see "Cross-tenant Synchronization"
You should see under "configurations" the external tenant we have configured from External Identities in my case NeilLab is available to configure from my previous B2B Direct post.

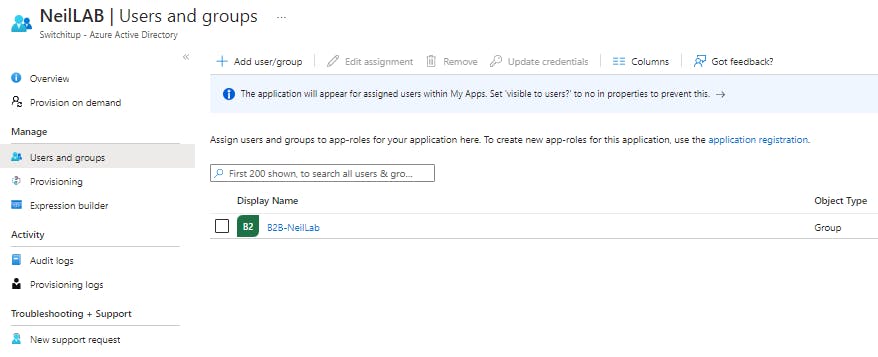
if you click into the external identity and then navigate to "Users and Groups" you see the security group "B2B-NeilLab" that I set up in "Outbound Settings". The users in this group will be synced into the external tenant when we run the provisioning.
click on "Overview", from here you can start the provisioning and view sync status. If you add new members to the group you need to manually run provisioning to push changes instantly or wait for it to sync by itself.
Click "Start Provisioning" Depending on the number of identities this might take some time. Once completed and hopefully no errors your users should slowly start to appear in the external tenant as guests. The great thing about how we have set this up is the guests don't even need to be invited
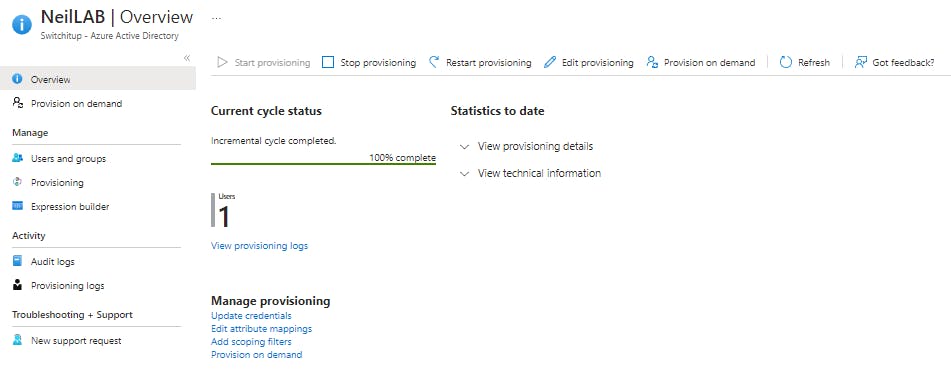
We only have one user in our B2B groups for testing as you can see this user has been provisioned and the cycle status is 100%
External Tenant Setup
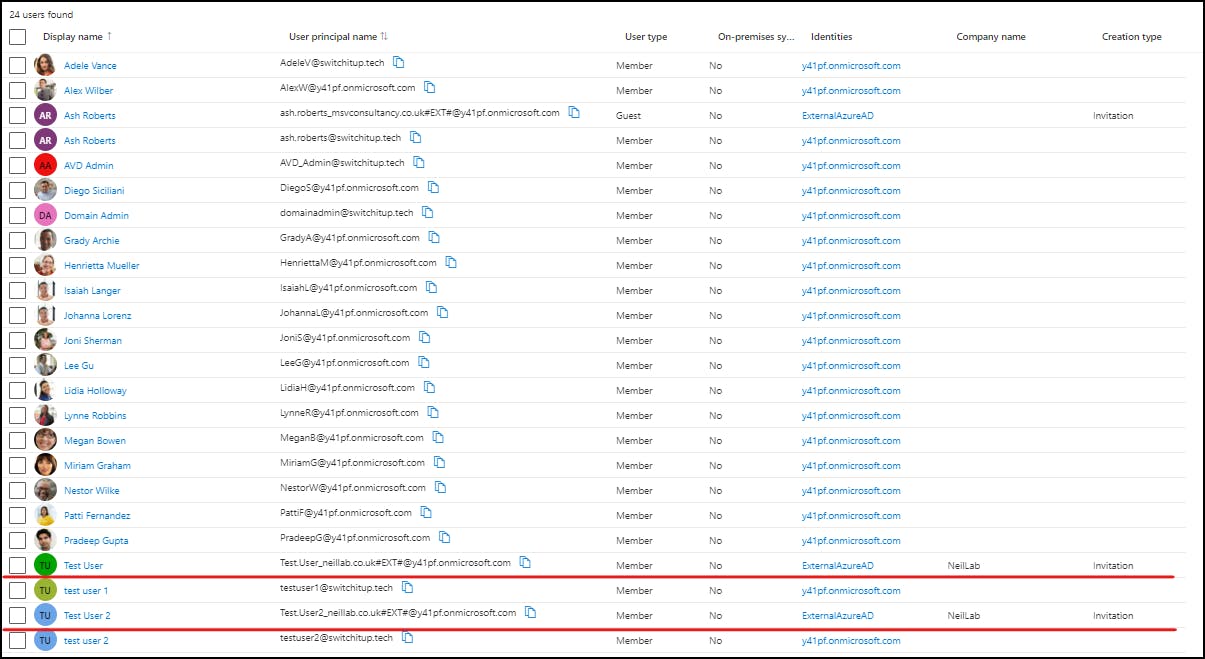
The administrator of the external setup needs to follow the same setup on their side and run provisioning to push the required users across to your tenant. As you can see I'm starting to see NeilLabs test users in my Azure AD. (Have synced an extra user since the above step)
Now we have external users in our tenant lets now start working on our Address Lists
Exchange Online Pre-checks
First, we need to make some changes to the "Address List" role in Exchange Online, by default, this role isn't allocated to any user or admin. Until this is allocated you will not be able to use the Address List commands in the Exchange Powershell module.
To make things slightly more complicated we need to "hydrate" our tenant so we can make changes to the roles.
Exchange Online has the Enable-OrganizationCustomization cmdlet to "hydrate" the settings in an organization
you must run this command in Exchange Online Powershell while you are logged into your tenant and then WAIT patiently for the changes to sync. Otherwise, when you make any changes to the roles it will not be able to save your changes. This took nearly an hour for my tenant.
Navigate to the Exchange Online Admin Center
"Roles > Admin Roles"
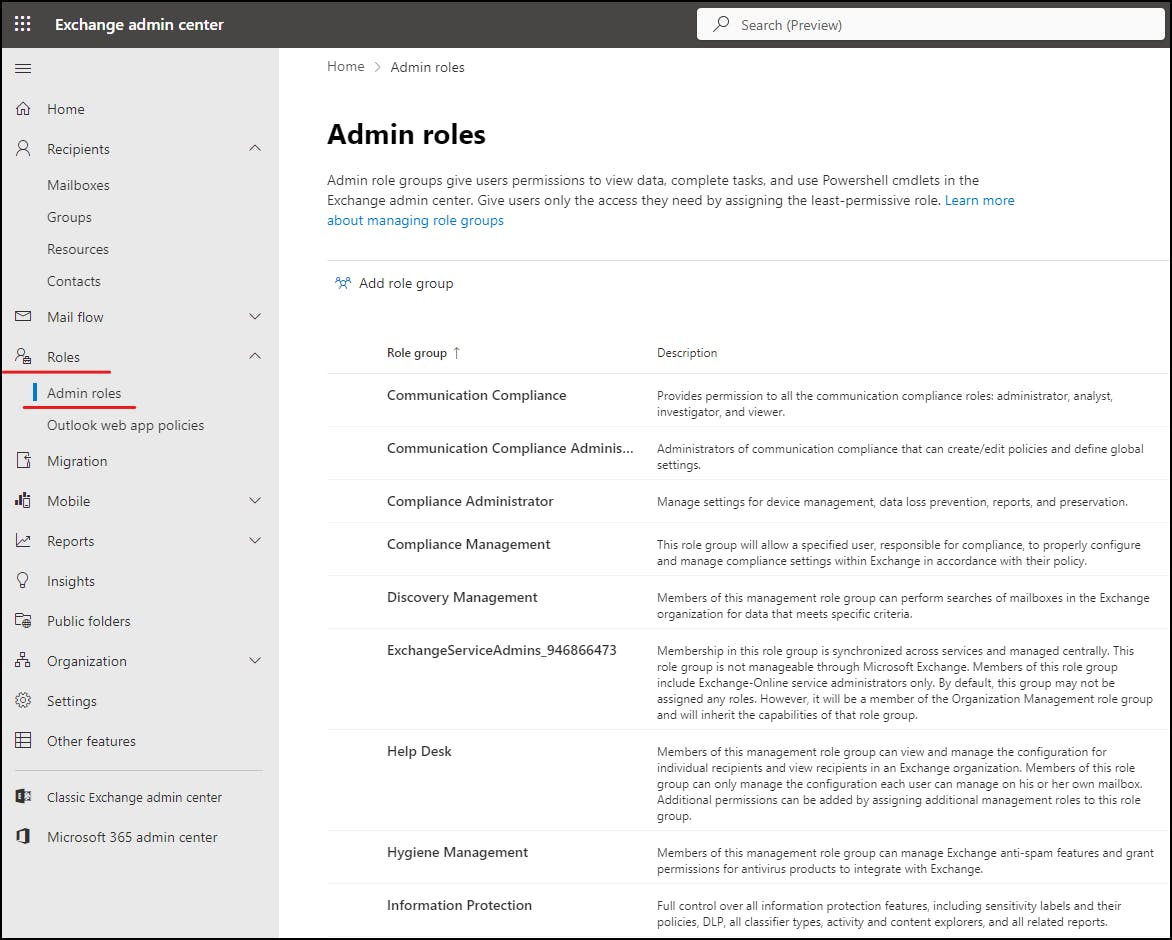
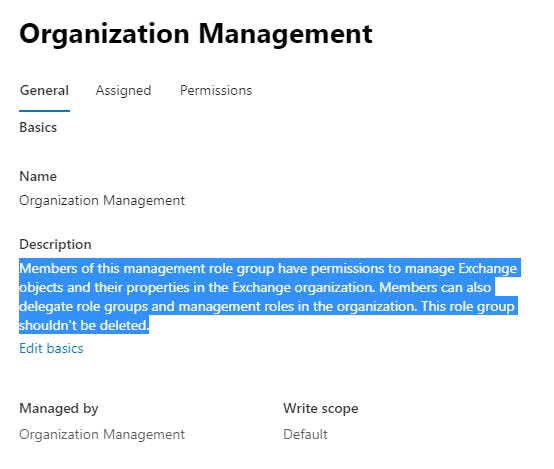
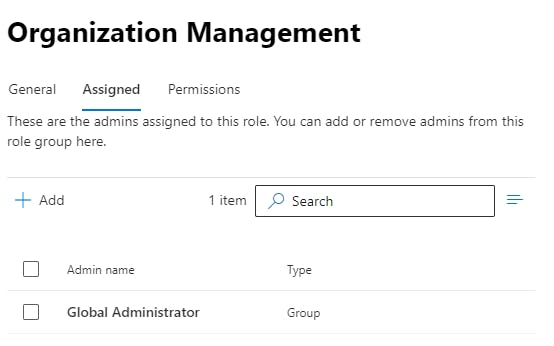
We want to add Address Lists to "Organization Management" You will notice global admin is automatically applied to this role. So as long as your using a global admin account to create address lists you will be covered.
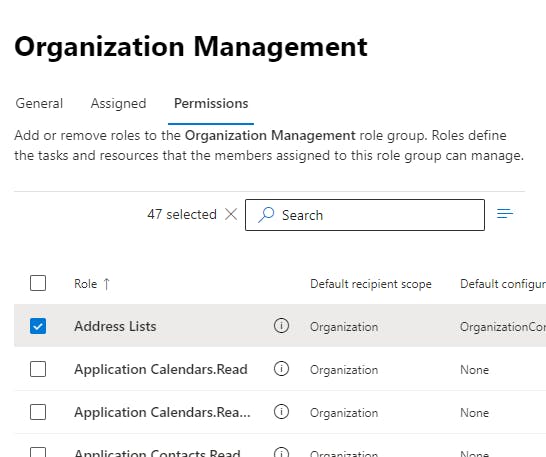
Click on the "permissions" tab to add Address Lists to the role. Hit the save button when applied.
once everything has synced we can now log in to Powershell Exchange Online and start creating new Address lists.
Creating Address Lists and Policies
Address Lists
Basic GET commands relating to Address Lists:
##Get a list of currently configured Address books
get-addresslist

##Get any addressbookpolicies
get-addressbookpolicy

##Get name of global address lists
get-globaladdresslist

##get name of offline address books
get-offlineaddressbook
Configure New Address Lists
##Create an address list called Switchitup where the alias is not equal to empty AND @switchitup.tech exists in the UPN

New-AddressList -Name "Switchitup" -RecipientFilter {(alias -ne `$null) -and (userprincipalname -like '*@switchitup.tech')}

##Create an address list called NeilLab where the alias is not equal to empty AND @neillab.co.uk exists in the UPN

New-AddressList -Name "NeilLab" -RecipientFilter {(alias -ne `$null) -and (userprincipalname -like '*@neillab.co.uk')}
Let's verify what we have created with Get-AddressList:

I have cut the default lists out but you can use those for an idea of the queries you can build for filtering attributes etc.
Address book Policy
Now we can apply these to a unique policy and assign the policy to our users.
We have added to the policy all the default address books users see in exchange online then added NeilLab and Switchitup address lists to the mix. You can use the GET commands above to find the names of the address books so you can add them to your code.
Any user that has the "NeilLab Testing ABP" will get all the default boxes + our new additional created address lists. Example below:
set-AddressBookPolicy -Name "NeilLab Testing ABP" -OfflineAddressBook "\Default Offline Address Book" -GlobalAddressList "\Default Global Address List" -RoomList "\All Rooms" -AddressLists "NeilLab", "All Contacts", "All Users", "All Distribution Lists", "All groups", "Public folders", "Switchitup"
Again let's verify:

Apply a Policy
To apply a policy we need to go to Exchange Online Admin Centre
Navigate to:
"Active Users > (User Name) > Mailbox >Manage Mailbox Policies"
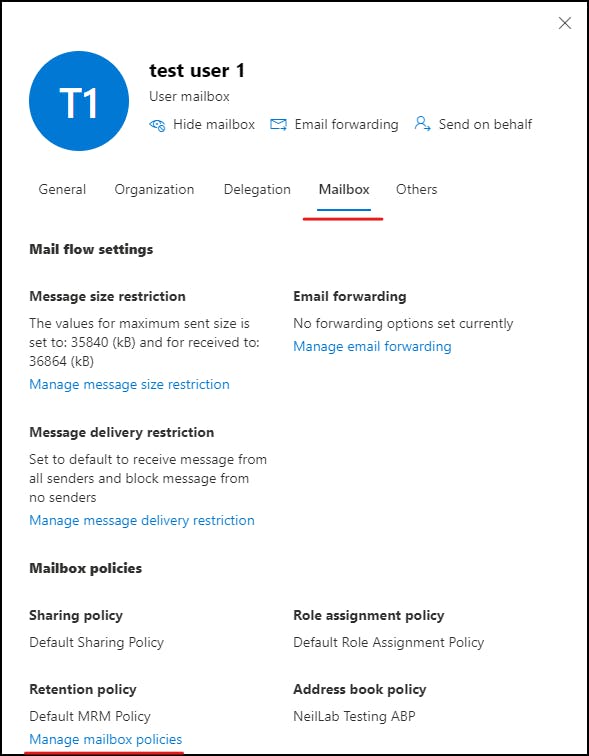
apply the policy you created under Address Book Policy.

Testing
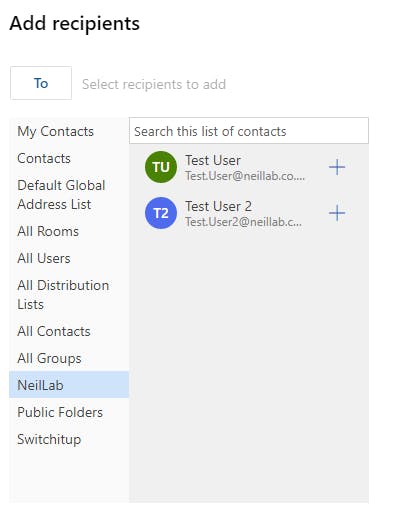
Usually testing with OWA is quicker sometimes than the Outlook client. Load OWA, and compose a new email. Select the "To" button to bring up the Global Address List.
Notice my user sees the new Address Lists and the two synced recipients that exist in my tenant only under NeilLab.
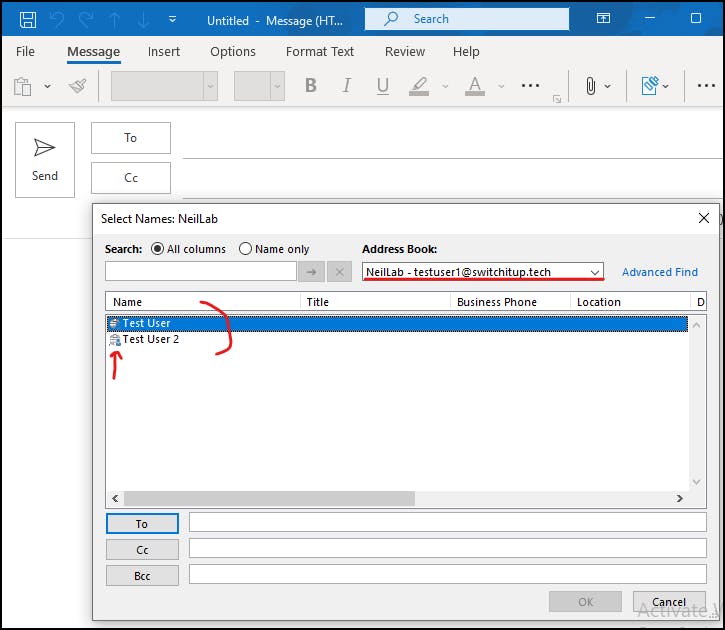
Let's verify in Outlook Client:
Switchitup address list with internal users:
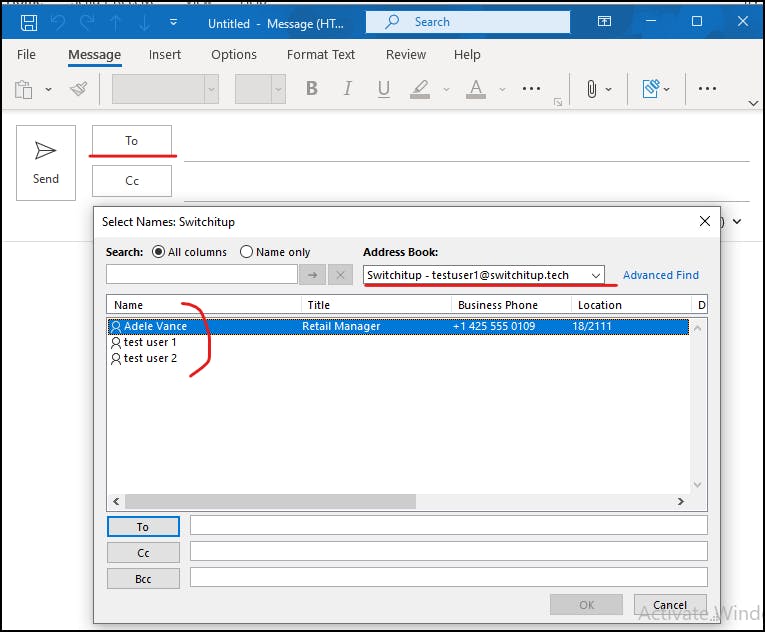
NeilLab with external users (notice they get a pretty external user icon on their address listing)
Pretty neat stuff. Now this would need to be repeated In the external tenant to create the address lists on their side as the user's mailboxes still reside in their home tenant.
Summary
Post 1 looked at setting up Azure B2B to be able to use Teams shared instances.
How to setup B2B Direct in Azure and use Teams Shared Instances (switchitup.tech)
Cross-Tenant Sync takes the B2B experience further by allowing external identities to sync with your Azure AD. This allows for a more automated approach to managing external identities. Unfortunately, cross-tenant sync on its own wont give you the Teams shared experience and doesn't look like Microsoft is going to change that anytime soon.
We have also looked at how to break down the GAL into separate address lists so we can filter between internal and external Address Lists using simple custom queries used to filter user results down.
That's all for this post and thank you for reading.